

Abstract:
- This is a quickstart for setting up a testing environment in Visual Studio
- Step 1 - Create a new class libary for your tests.
- Step 2 - Add a reference to nunit.framework.dll
- Step 3 - Get a test runner like the one in Resharper, TestMatrix or NUnit.
- Step 4 - Start writing tests and run them with your test runner!
- Step 7 - Here are some mocking frameworks: Rhino mocks, NMock, TypeMock, Moq
- Step 10 - Profit!
For the benefit on any beginners stumbling across this blog, here is what you need to get started writing Unit Tests on the .NET platform.
Step 1 - Create a new class library in Visual Studio
Call it something along the lines of YourProjectNamespace.Testing
Step 2 - Download the NUnit framework.
The NUnit framework is pretty much the industry standard for running Unit Tests on the .NET platform.
Microsoft has created something called MSTest that nobody uses. To be honest I haven't looked into it very much and I see no reason to start now. :)
Get NUnit here: http://www.nunit.org/index.php?p=download
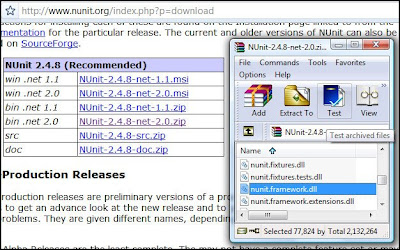
Then copy bin/nunit.framework.dll to your test project bin folder (that is: add it to your ThridPartyLibraries folder and create a reference to it in your testing project)
Step 3 - Get a test runner
To run unit tests you need a program to run them, preferably one integrated with Visual Studio.
I have found the test runner that comes with Resharper to be the nicest one out there right now.
Resharper is a plugin for Visual Studio that unfortunately is not free, but is probably one of the best investments you can make as a developer. Read all the hype on their homepage and give it a spin.
If you don't want to use resharper to run your tests here are some alternatives:
TestMatrix - Another commercial tool that works.
NUnit - NUnit comes with a free test runner that is functional but crude. Only use it if you have to.
If none of these work for you use the power of google.
Step 4 - Create a unit test!
Wohoo, let's get cracking!
As an example, let's take the testing of a class validating the format of an email address.
Start by creating a file in your test project called EmailValidatorTests.cs
Copy and paste this code into the file:
using System;
using NUnit.Framework;

namespace OmgWtfTdd.Testing //You'll want to change this to match your project
{

[TestFixture] //This tells the test runner that this class contains tests
public class EmailValidatorTests
{

    private EmailValidator _emailValidator;

    [SetUp]
    public void SetUp()
    {
        // The code in SetUp will be run before the execution of each unit test.
        // Here we create things that will be used in multiple tests
        _emailValidator = new EmailValidator();
    }

    [TearDown]
    public void TearDown()
    {
        // The TearDown method is run after each test completes.
        // Use it to tear down anything not caught by normal garbage collection
    }

    [Test] // <-- Look! A Test!
    public void TestIsValidEmail_NoInput()
    {
        Assert.IsFalse(_emailValidator.IsEmailValid(String.Empty));
        Assert.IsFalse(_emailValidator.IsEmailValid(null));
        // Assert is a way of evaluating a condition
        // If the Assert is not fullfilled the test fails.
        // If an unexpected exception is thrown the test fails.
    } // <-- If the test manages to get all the way to the end the test succeeds!

    [Test]
    public void TestIsValidEmail_TrueForValidEmails()
    {
        Assert.IsTrue(_emailValidator.IsEmailValid("erik@thisisnotmyrealemail.com"));
        Assert.IsTrue(_emailValidator.IsEmailValid("erik@providerwithtwodots.co.uk"));
        Assert.IsTrue(_emailValidator.IsEmailValid("erik.rydeman@dotsinthename.com"));
    }

    [Test]
    public void TestIsValidEmail_Badformats()
    {
        Assert.IsFalse(_emailValidator.IsEmailValid("@noname.com"));
        Assert.IsFalse(_emailValidator.IsEmailValid("noprovider@.com"));
        Assert.IsFalse(_emailValidator.IsEmailValid("noprovidertall@"));
        Assert.IsFalse(_emailValidator.IsEmailValid("nodomain@lol."));
        Assert.IsFalse(_emailValidator.IsEmailValid("erik@domain.reallylongtopdomain"));
        Assert.IsFalse(_emailValidator.IsEmailValid("wheredidtheatgo.com"));
    }
}

/// <summary>
/// This class would normally be placed somewhere in your project.
/// The classes in the Testing project is for testing only and not used in production code.
/// </summary>
public class EmailValidator
{
    public bool IsEmailValid(string email)
    {
        // This line is what you'd normally start out
        // with writing your tests before your code:
        //throw new NotImplementedException();

        // I've cheated and started a bit. See if you can improve it!
        return email.Contains("@");
    }
}
}
That's a Unit Test for you! Actually that's three unit tests. Let's see if they work:
To run the tests with Resharper:
Right click somewhere in EmailValidatorTests and select "Run Unit Tests" from the menu.
Or: In the top menu select Resharper/Unit Testing/Run All Tests From Solution
To run the tests with the NUnit Test Runner:
Compile the Testing project, open the NUnit Test runner and find the dll for the testing project.
Run the tests.

In order for you to be able to test your environment I have made on of the tests succeed already. Note that following the principle of writing tests first you should always see it fail before you fix it.
As you can see the IsEmailValid method is quite incomplete. As an exercise, try making the two other tests succeed!
Step 7 - Get a mocking framework!
Since this post is about setting up your test environment let's skip ahead a few steps and briefly mention another thing you'd typically need to do in a project.
In any non trivial project you'll usually come accross the need to fake some classes in order to be able to test other classes. One way to do this is to create mock objects. We'll talk about this later, but here are some mocking frameworks you can use:
Rhino Mocks - My current favourite. Easy to use, powerful, strongly typed mocking.
NMock - Uses strings to specify which methods to mock. Not too elegant but very easy to understand.
TypeMock - Very powerful and useful but a bit magical. Requires integration into the VS environment which can sometimes cause problems.
Moq - Haven't tried it yet but it sure looks very nice.
They all pretty much do the same thing so use the one you like!
If you wouldn't know what to do with any of them just yet, don't worry. Start writing some regular tests and we'll tackle mocking later!
Step 10 - Profit!
There, if you've completed all the steps above you now have the power to write Unit Tests!
Use it wisely.

0 comments:
Post a Comment